
Installation Instructions
Download PDFFirst, know your decal
Your decal arrived as three layers stacked together. The rest of these instructions refer to them by name, so it is worth a moment to learn which is which.
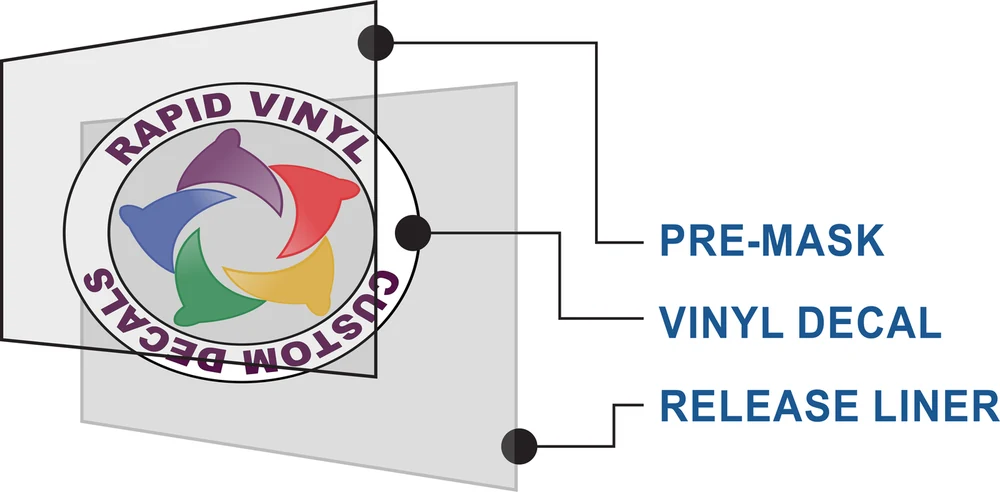
- Pre-mask (also called transfer tape)
- The clear or translucent top layer. It holds your letters in position while you work, and it comes off last.
- Vinyl decal
- The lettering or graphic itself. This is the only layer that stays on your surface.
- Release liner (the paper backing)
- The white or blue waxy paper on the back. This comes off first and gets thrown away.
Gather these before you start
- A squeegee, or a credit card
- Masking tape
- A tape measure
- Scissors
- Rubbing alcohol, or Dawn dish soap and water
- A clean terrycloth towel
- A spray bottle of plain water
- A helper, if your decal is large
Wet or dry? Find your material
- Standard vinyl
- WET.Mist plain water on the surface right before you position the decal. It lets you slide it into place and squeegee the bubbles out.
- Reflective and chrome
- DRY ONLY.These will not bond to a wet surface. Do not mist them.
- Indoor wall vinyl
- DRY ONLY.Never use water when you are installing onto a wall.
Prep the surface
Start by unrolling the decal and letting it lie flat for a while. Shipping rolls it up, and it installs far more easily once it has relaxed. While it settles, get the surface ready.
- Clean the surface thoroughly with rubbing alcohol or a mixture of Dawn dish soap and water, and then dry it completely with no leftover residue.
- Do not use Windex or similar glass cleaners. They leave behind a residue that stops the decal from sticking.
- For a wall decal, clean it the way that surface should be cleaned. If the paint is new, let it cure at least 30 days first.
- For a vehicle, work in a garage or somewhere out of the wind, at 60°F or warmer. Wax, road film and truck-wash chemicals all block adhesion, so make sure they are gone.
Burnish the decal, then loosen the liner
This step takes two minutes and prevents the most common problem in the whole install. Do it right before you hang the decal, not the night before.
- Lay the decal on a flat surface and rub firmly across the pre-mask with your squeegee or credit card. This pushes out trapped air and makes sure the vinyl is gripping the pre-mask rather than the liner.
- Concentrate on the lettering itself. Wrinkles out in the empty areas do not matter.
- If it is easier, flip the decal over and rub it from the back instead. The result is the same.
Position it and tape it down
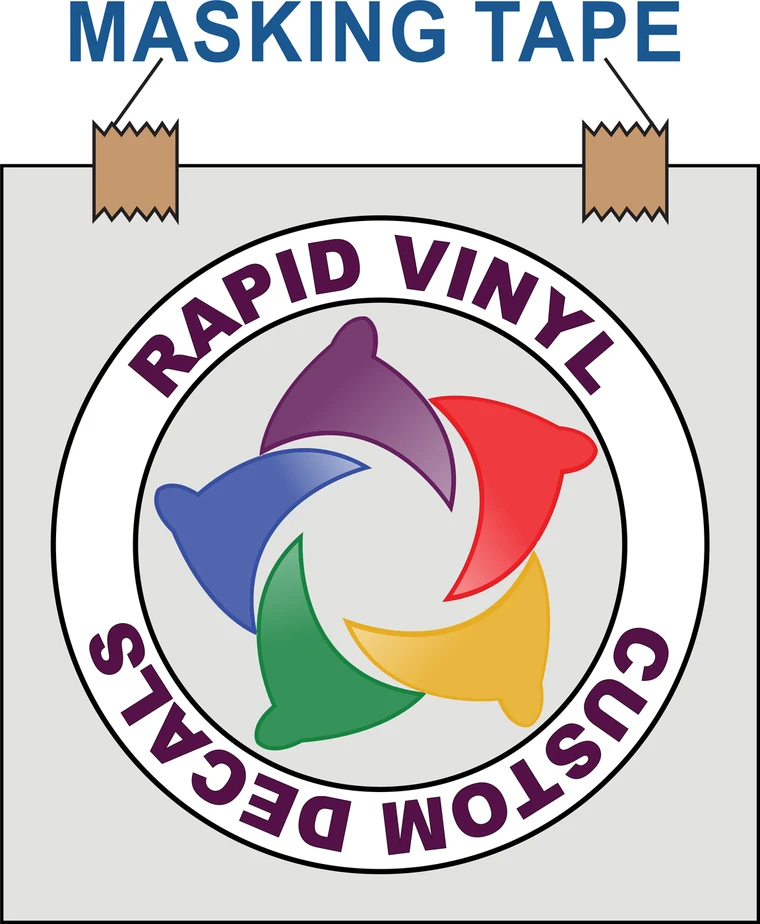
Hold the decal up against the surface and judge the position by eye first. Once it looks right, measure it, then hold it there with small pieces of masking tape at the corners.
- Measure to the lettering or graphic itself, never to the edge of the pre-mask or the liner. Those outer edges are trim cuts and are not square.
- Check it side to side and top to bottom, then step back and look at it from a distance. Keep adjusting until you are happy with it.
- On a vehicle, line it up with a body line, a door edge or a window seal. When the tape measure and the body line disagree, follow the body line. That is what the eye sees.
Make a hinge
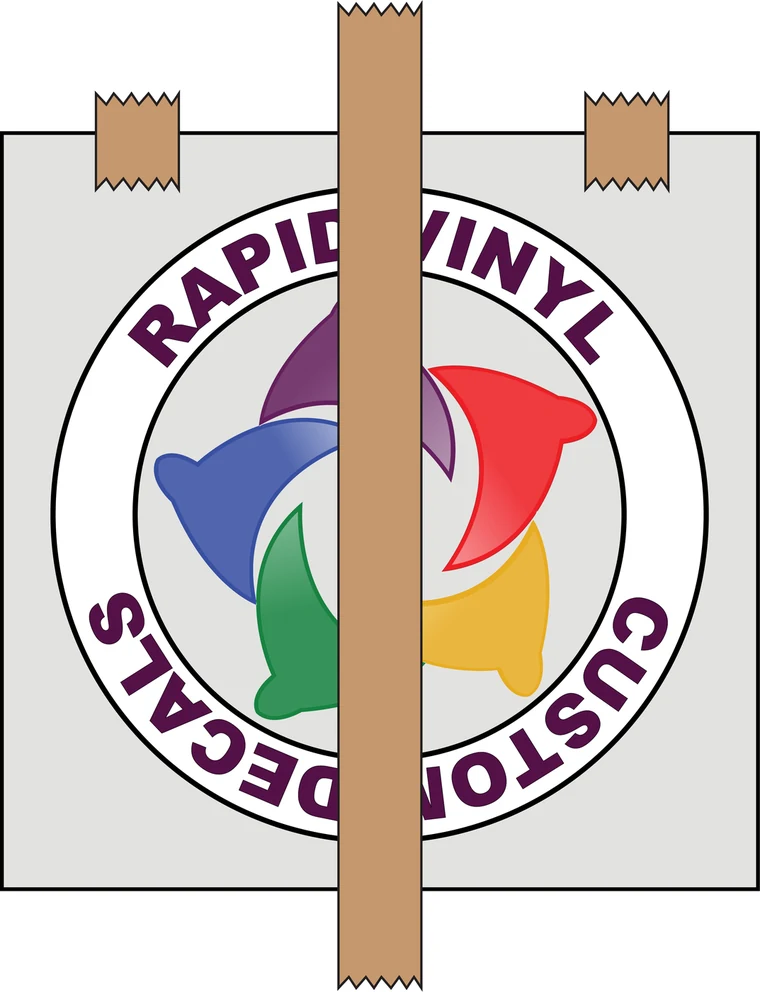
The hinge is a strip of masking tape running all the way across the decal. It is what holds your alignment while you peel and squeegee, so take a moment to get it right.
- For a wide decal, run the hinge down the middle, vertically, and plan to do one half at a time.
- For a tall or narrow decal, run the hinge across the top, horizontally, and work your way down.
- Press the hinge tape down firmly. If the hinge slips, your alignment is gone and you start over.
Remove the liner from the first half
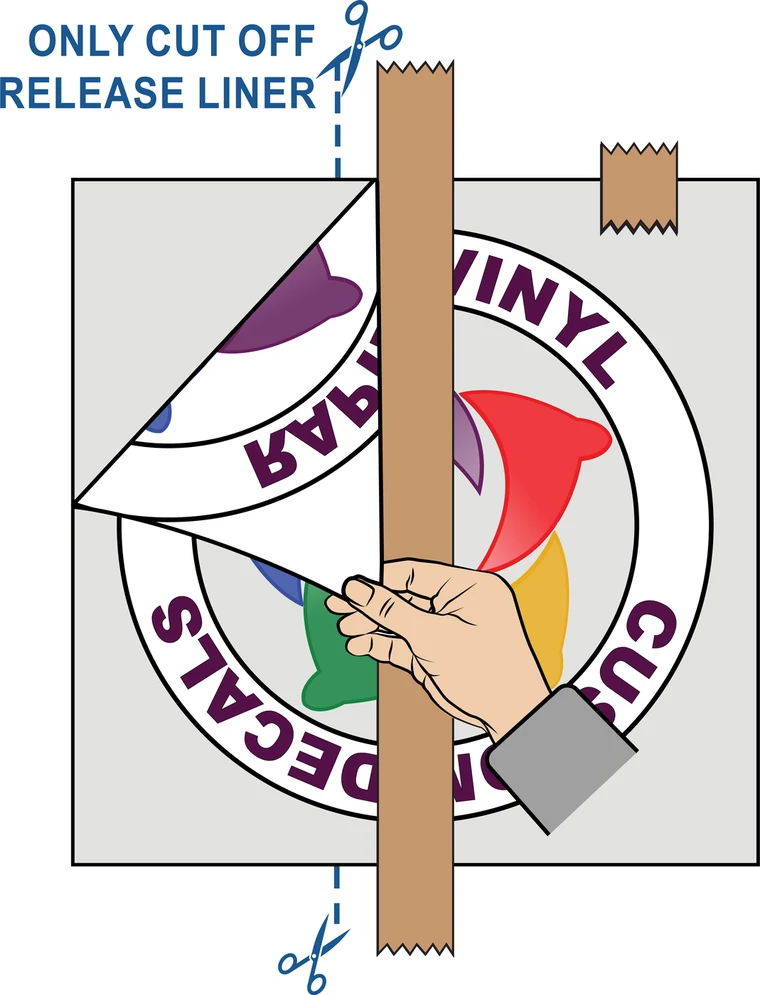
Lift the free half of the decal away from the surface and fold it back on the hinge, so the hinge stays put and the loose half hangs toward you.
- Peel the release liner off that half, pulling it back at a sharp angle. Go slowly and keep an eye on the letters. They should stay on the pre-mask.
- If a letter starts lifting with the liner, lay it back down, squeegee that spot, and try again.
- Cut the loose liner off with scissors and throw it away. Cut the liner only, never the pre-mask or the vinyl.
- Tape the exposed half up out of the way, or have a helper hold it. Do not let it touch the surface yet.
Squeegee that half into place
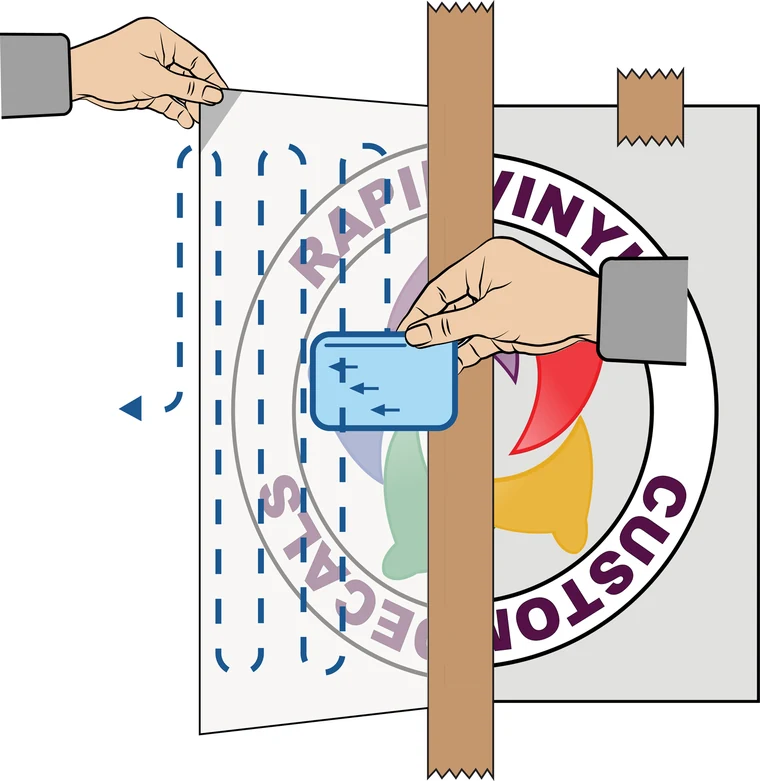
If you are using the wet method, mist the surface now. Then lower the decal a little at a time. Do not let the whole panel drop at once.
- Hold the free end up with one hand and squeegee with the other, working from the hinge outward in firm, overlapping strokes.
- Water squeezing out along the edges is normal and expected.
- Once this half is down, take off the hinge tape and repeat steps 5 and 6 on the other half.
Peel off the pre-mask
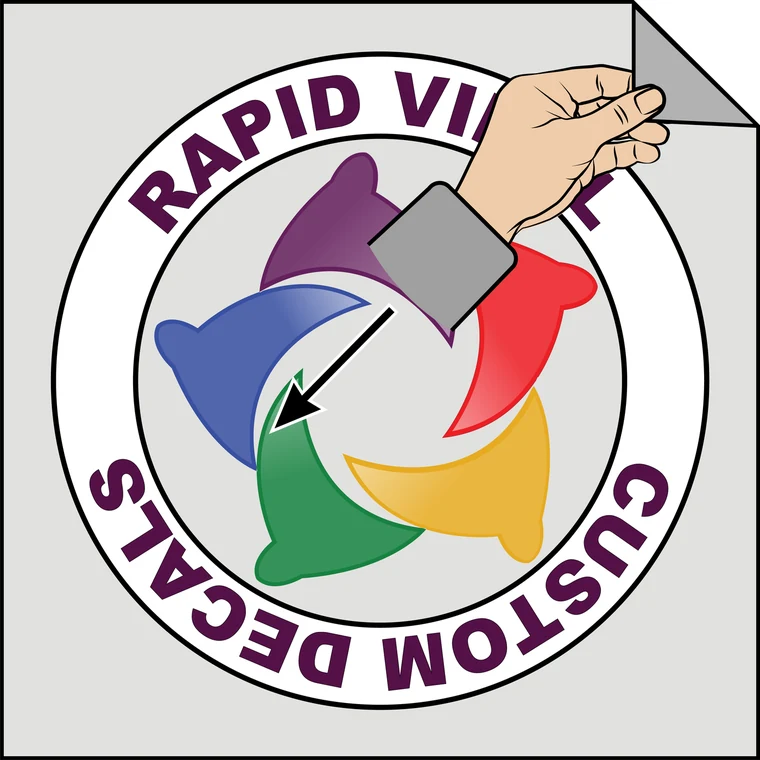
Give it about 30 minutes before you pull the pre-mask, and longer than that if it is cold out or you used the wet method. This is the step where patience pays off.
- Pull the pre-mask back on itself at a sharp angle, almost flat against the surface. Pulling it up and away is what lifts letters.
- Work slowly, a few inches at a time.
- If a letter starts coming up with the pre-mask, lay it back down, squeegee that area again, wait a few minutes, and restart from a different corner.
Dab it down and let it cure
The decal is on, but the adhesive is nowhere near full strength yet. How you treat it over the next week decides how long it lasts.
- Take a clean, dry terrycloth towel and lightly dab across the decal, making sure every edge is flat. Dab, do not wipe. Wiping at this stage drags the letters.
- Let it cure somewhere above 70°F for several hours, or for several days in cold or humid weather. The adhesive keeps building strength the whole time.
- Keep it out of the car wash for at least a week, and longer if temperatures are below 70°F. Pressure and cold weather are what lift a decal off a moving vehicle.
- Small bubbles usually disappear on their own after a few days in the sun. If one is still there after a couple weeks, prick it with a pin and press it flat.
If something goes wrong
- Letters stayed on the liner
- Lay it back down, squeegee hard, and peel again slower and flatter.
- Bubbles under the vinyl
- Squeegee from the center outward. Still there after a couple weeks? Prick with a pin and press flat.
- Edges lifting
- Press the edge down and warm it gently with a hair dryer. Depending on your surface, a little clear fingernail polish along the edge can also work.
Ran into trouble? Tell us.
We will supply replacement letters or sections of your decal at a fair price. Text us at (708) 320-1179 and we will take care of it.